
AutoSuggest Behaviour in ADF With Static Values
ADF 11.1.1.2 added a new Auto Suggest capability that allows you to provide automatic suggestions as a user types data in a field (just like Google do). This post provides a quick demo of how to use this capability. You will need JDeveloper 11.1.1.2 (or later) to do this.
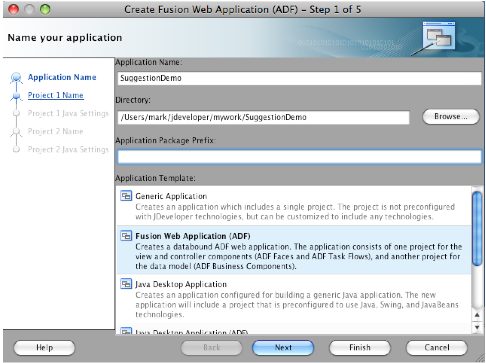
First, we create a new application, by selecting New from the File menu.
Select Fusion Web Application (ADF) as the template, and give your application a name. I called mine SuggestionDemo. Then click on Finish.
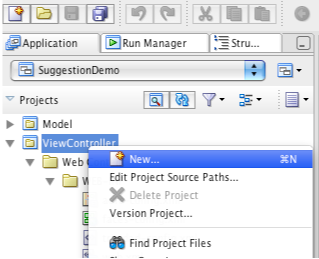
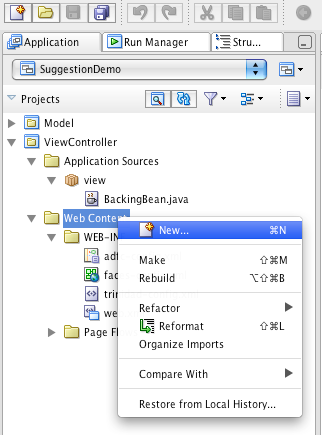
Two projects will be created for you. We are only going to use the ViewController project in this example. Right click on this project and select New…
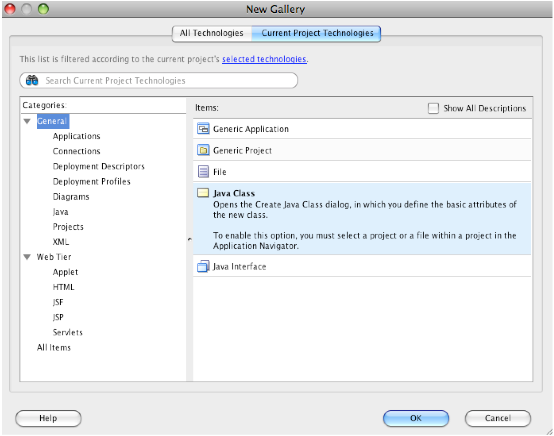
We are going to create a Java class that will act as the source of our suggestions. You could also use a web service, or a database, etc. to get the suggestion list. Select the General category and Java Class on the right hand side. Then click on OK.
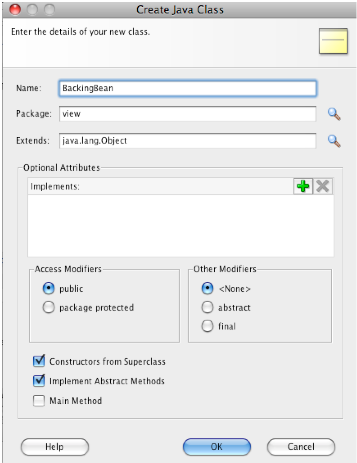
Give your class a name. I called mine BackingBean. Then click on OK.
Here is the code for the class. In this example, I have just set up a list of city names in the constructor. You need to provide a public method that returns a List and accepts a String as input in order to use it for suggestions. In the method below, I am just going through the list and finding all of those that contain the input String. ADF will send the current contents of the field to this method as the users types.
package view;
import java.util.ArrayList;
import java.util.List;
import javax.faces.model.SelectItem;
public class BackingBean {
private List<SelectItem> suggestions = new ArrayList<SelectItem>();
public BackingBean() {
super();
//initialise list of choices
suggestions.add(new SelectItem("Sydney"));
suggestions.add(new SelectItem("Melbourne"));
suggestions.add(new SelectItem("Singapore"));
suggestions.add(new SelectItem("Tokyo"));
suggestions.add(new SelectItem("Beijing"));
suggestions.add(new SelectItem("San Francisco"));
suggestions.add(new SelectItem("New York"));
suggestions.add(new SelectItem("Houston"));
suggestions.add(new SelectItem("Seattle"));
suggestions.add(new SelectItem("London"));
suggestions.add(new SelectItem("Paris"));
}
public List getSuggestions(String input) {
// create a new list to hold matching items
List<SelectItem> items = new ArrayList<SelectItem>();
// loop through the suggestions list
for (SelectItem item : suggestions) {
// check if each item contains the input string
// convert both to upper case to make a case insensitive comparison
// you could also do startsWith() or other String comparison methods here
if (item.getLabel().toUpperCase().contains(input.toUpperCase())) {
// if the item contains our input string, add it to our matching items list
items.add(item);
}
}
// return the matching items
return items;
}
Now we will create our user interface. Right click on the Web Content folder in the ViewController project and select New…
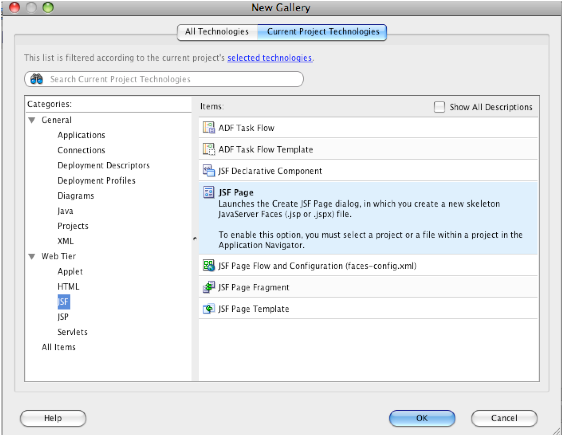
Select JSF from the Web Tier folder on the left, and JSF Page on the right and click on OK.
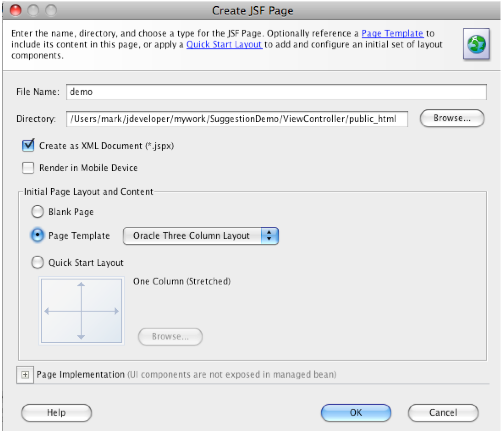
Give your page a name, I called mine demo and pick a starter page template. I chose the Oracle Three Column Layout. Then click on OK.
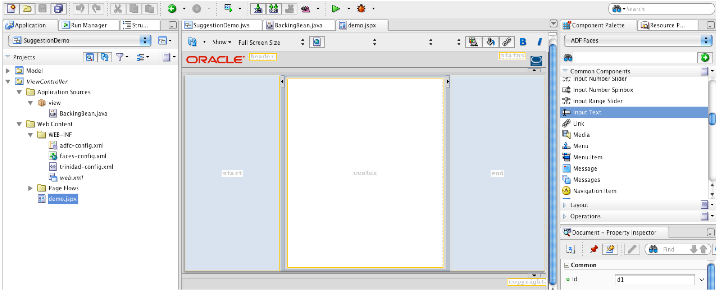
Your new page will open in the designer (as shown below). Drag an Input Text component from the Component Palette onto the white area in the middle of the page. If you cannot see the Component Palette, you can open it from the View menu.
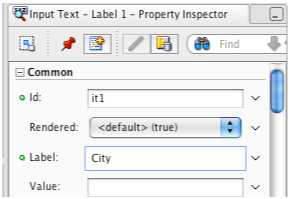
Click on the new input field and update its Label in the Property Inspector. I called mine City as you can see below. Again, if you cannot see the Property Inspector, you can open it from the View menu.
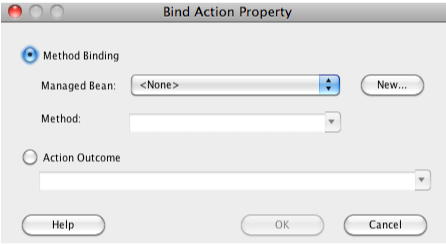
We need to tell our page about the backing bean we created. this is done by creating a binding. You can just double click on the input field itself. This will open the Bind Action Property dialog box as shown below. Click on the New… button.
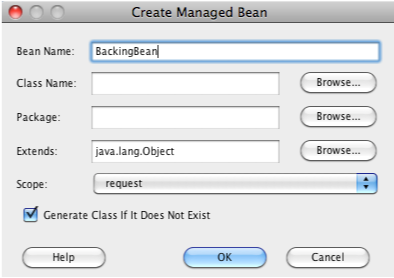
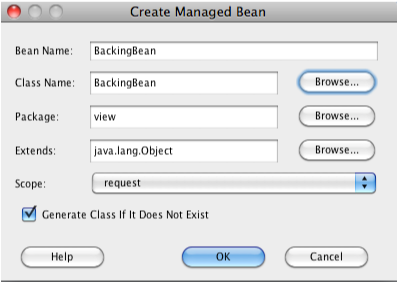
Type in a name for your bean. I called mine BackingBean. Then click on the Browse… button next to the Class Name field.
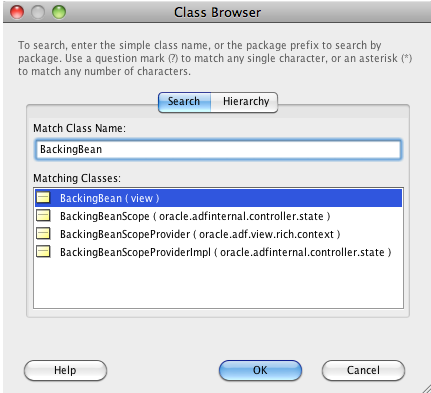
The Class Browser dialog box opens. Type in the name of the class you created earlier, and then select it from the list and click on OK.
The Create Managed Bean dialog box should now look like the example below. Click on OK.
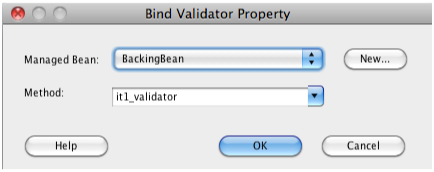
You are returned to the Bind Validator Property dialog box now. At this point, the binding we need has already been created, so you can just click on Cancel here.
Now right click on the input field and select Insert inside Input Text – City and then ADF Faces… from the popup menu.
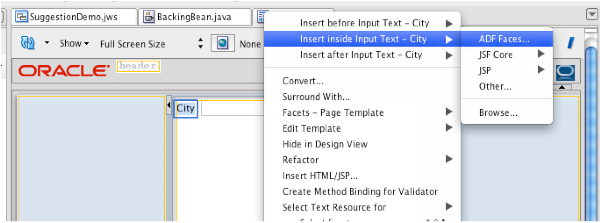
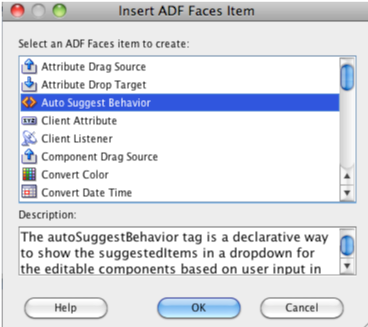
In the list that appears, select the Auto Suggest Behavior and then press OK.
A dialog box will appear so that we can specify the source of the suggested items. Click on the little arrow to the right of the field and then select Method Expression Builder… from the menu that appears.

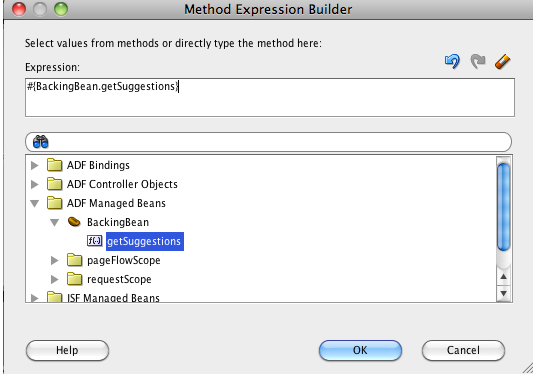
Navigate through the folder structure to find your backing bean's getSuggestions method (or whatever you called yours) as shown below. When you select it the expression will be filled in automatically, as shown. Then click on OK.
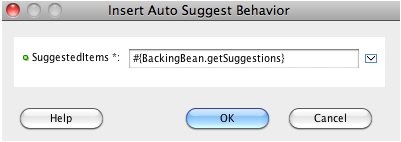
You will see the expression has been added to the dialog box. Press OK again.
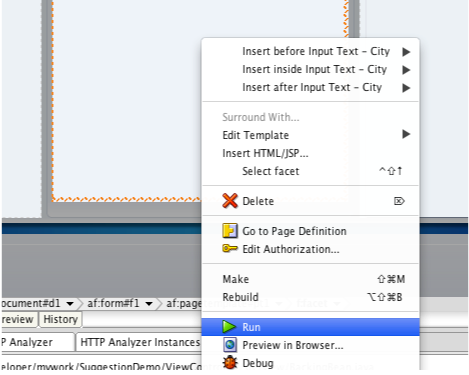
Now we are ready to try it out! Select Save All from the File menu to save your work, then right click on the page somewhere and select Run from the menu.
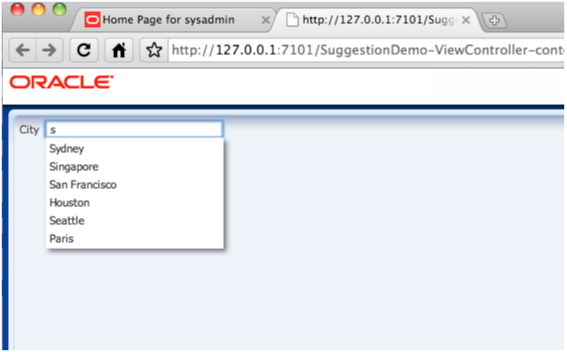
This will start your embedded WebLogic Server (if it is not already running), build and deploy our application and open this page in your default browser.
When the browser opens you can just start typing in the City input field (as shown below) and you will see the suggestions appear and change as you type more characters in the field. You can use the arrow keys to select a recommendation, or you can click to select.
It's as easy as that. You can use the automatic suggestions anywhere you can use an input field, incuding inside other components.